 By Graham Fisher
Updated November 2026
A good garden layout companion planting plan puts compatible vegetables, herbs and flowers close enough to benefit each other while keeping spacing, sunlight and watering needs in balance. By the end of this guide, you will know how to sketch a bed or plot, group crops by their needs, place tall and short plants correctly and avoid the layout errors that cause most companion planting disappointments.
Why Layout Matters More Than the Pairing List
Most people start companion planting by memorizing pairs: tomatoes with basil, carrots with onions, beans with corn. Those pairings are useful, but they only work if the plants can actually grow together. Two good companions planted so tightly that they shade each other, or placed so that one drowns the other in runoff, will still underperform. Layout is what turns a list of pairings into a working garden.
Think of layout as three decisions: where each crop sits relative to sun, how far apart plants are spaced, and how beds or rows are arranged so that you can reach, water and rotate them without stepping on the soil.
Step 1: Map Your Sun, Water and Space
Before placing a single seedling, record how much direct sun each part of your plot gets. Most fruiting vegetables such as tomatoes, peppers, squash and eggplant need at least six to eight hours of direct sun. Leafy greens, parsley, chives and many herbs tolerate partial shade, roughly four hours a day.
- Walk the space at 9 a.m., noon and 3 p.m. on a clear day and note which areas are shaded.
- Measure the bed or plot in feet. A standard raised bed is often 4 by 8 feet; in-ground plots vary.
- Mark the spot nearest your water source, since thirsty crops should be grouped together.
- Note any existing trees, fences or structures that cast shade in the afternoon.
Place the tallest crops on the north side of the bed (in the Northern Hemisphere) so they do not shade shorter plants. Corn, pole beans on a trellis, sunflowers and indeterminate tomatoes all belong here. We also found Plan for a Companion Planting Garden Design: 7 Steps to Layout Beds useful on this point.
Step 2: Group Crops by Height and Water Needs
Once you know your sun pattern, sort your planned crops into three height groups and two water groups. Layout errors usually come from mixing these categories carelessly.
Height Tiers
- Tall (5 feet and up): corn, trellised pole beans, staked indeterminate tomatoes, sunflowers.
- Medium (1 to 3 feet): peppers, eggplant, bush beans, broccoli, cabbage, determinate tomatoes.
- Low (under 1 foot): lettuce, spinach, carrots, radishes, strawberries, parsley, chives.
Water Groups
Put heavy feeders and heavy drinkers such as squash, cucumbers and tomatoes in one zone, and drought-tolerant herbs such as rosemary and thyme in another. Mixing them means you either overwater the herbs or underwater the squash.
Step 3: Choose a Bed Arrangement
There are three layouts that work well for companion planting, and each suits a different space.
Block Planting in Raised Beds
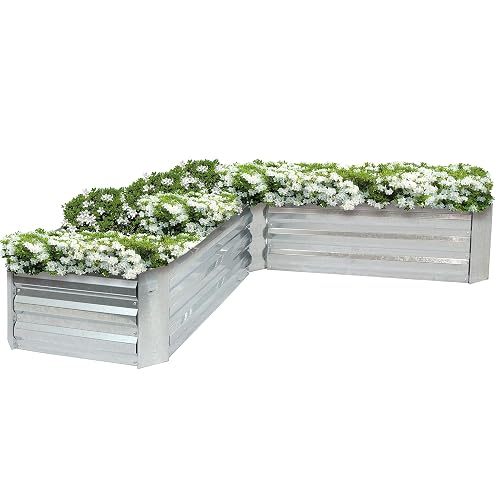
Divide a 4 by 8 foot bed into a grid of 12-inch squares, giving you 32 cells. Plant one crop per square or group two to four small plants per cell. Pair a tomato in one corner with basil on either side and a marigold in the adjacent corner. Leave the aisles, which are the spaces between beds, at least 18 to 24 inches wide so you can reach the center without compacting soil. For a fuller walkthrough, see Raised Bed Garden Layout Companion Planting: A Step-by-Step Guide.
Row Planting in In-Ground Plots
In a larger plot, alternate rows of tall and low crops running north to south. A row of corn can serve as a windbreak for a row of lettuce that follows, and beans planted in the gap between them fix nitrogen for the corn. The planning details for this style are covered in Garden Plot Companion Planting Vegetable Garden Layout: A Step-by-Step Guide.
Interplanting in Small Spaces
In a container or tight bed, tuck fast-growing crops such as radishes and lettuce into gaps left by slower crops like broccoli. When the radishes come out, the broccoli has room to expand. For tight spaces generally, Small Garden Layouts: Making the Most of Limited Space offers useful approaches.
Step 4: Apply Spacing Rules
Companion pairings fail when plants crowd each other. Use the spacing below as a starting point, adjusting for variety and local conditions.
| Crop | In-Row Spacing | Good Companions | Keep Apart From |
|---|---|---|---|
| Tomato (staked) | 24 inches | Basil, marigold, parsley | Potato, fennel |
| Pepper | 18 inches | Basil, carrot, onion | Fennel, kohlrabi |
| Bush bean | 4 to 6 inches | Carrot, cucumber, corn | Onion, garlic |
| Corn | 12 inches | Pole beans, squash | Tomato (with caution) |
| Lettuce | 8 inches | Carrot, radish, strawberry | Cabbage family in heat |
| Strawberry | 12 inches | Lettuce, spinach, borage | Brassicas |
Spacing also governs airflow. Crowded tomatoes and squash invite powdery mildew, so leave enough room that leaves dry within a few hours of watering.
Step 5: Plan Rotation and Succession
A layout that works in May can fail by August if the same family of plants sits in the same spot every year. Rotate crop families through each bed or zone, moving nightshades, brassicas, legumes and cucurbits to a new location each season. Sketch the bed on paper or in a garden planner and label it by year so you can see the rotation at a glance.
Succession planting follows the same logic. When the early lettuce is harvested, replant that square with bush beans or a second round of greens. Tools like Companion Planting Garden Planner: A Step-by-Step Guide for Better Yields can help you track these handoffs.
Step 6: Build Your Layout on Paper First
Drawing the layout before planting saves transplant shock and wasted seed. Use graph paper with one square per foot, or a simple spreadsheet grid.
- Draw the outline of the bed or plot to scale.
- Mark the tall tier on the north side and the low tier on the south.
- Place one main crop per block, then add companions in neighboring cells.
- Check that every crop can be reached from an aisle without stepping on soil.
- Label the paper plan with planting dates from your last frost date.
If you want a printable reference, 6 Best Garden Layout Free Printable Printable Companion Planting Charts (2026): Our Picks lists charts worth comparing. For a quick start on beds, Companion Planting for Raised Garden Beds: A Step-by-Step Guide is a good companion read.
Recommended gear
A few supplies make layout work easier, especially in the first season.
- Garden marking flags or plant labels: they let you record crop, variety and sow date in each block, which keeps rotation honest. View on Amazon
- A soil knife or hand trowel: useful for marking precise planting holes at spacing intervals. View on Amazon
- A measuring tape or string grid kit: a 100-foot tape or string marked at one-foot intervals lets you lay out square-foot grids quickly. View on Amazon
- Graph paper or a garden planning notebook: a scaled paper plan is the simplest way to test pairings before you commit seed. View on Amazon
Common Mistakes
- Overcrowding for the sake of companionship. Two plants that help each other still compete if spaced too tightly.
- Placing tall crops on the south side. This shades the entire bed and stretches shorter plants toward the light.
- Mixing drought-tolerant herbs with thirsty vegetables. The herbs rot while the squash wilts.
- Ignoring rotation. Companion pairs cannot prevent soilborne disease from building up in the same spot.
- Skipping the paper plan. Planting by feel usually leaves gaps and clusters that are hard to correct later.
Tips for a Better Layout
- Start with three to five crops rather than planting everything at once.
- Leave one square or row empty as a test space for succession crops.
- Keep a simple journal noting which pairings thrived and which struggled.
- Plant flowers such as marigold and nasturtium along bed edges to attract pollinators and deter some pests.
- Adjust spacing after your first season based on how large your varieties actually grew.
FAQ
What is the best layout for companion planting?
There is no single best layout. Block planting in raised beds suits small gardens, while row planting with alternating tall and low crops works better in larger in-ground plots. Choose the arrangement that fits your space and keeps every crop reachable.
How far apart should companion plants be placed?
Follow the spacing for the crop with the largest mature size, not the smaller partner. A staked tomato needs about 24 inches, while a basil plant beside it can sit 12 to 18 inches away. Crowding defeats the purpose of companion planting.
Where should tall plants go in a garden bed?
Place tall plants on the north side of the bed in the Northern Hemisphere so they do not shade shorter crops. In the Southern Hemisphere, reverse this and put them on the south side.
Can I use companion planting in containers?
Yes. Choose a large container, at least 12 inches deep for most vegetables, and pair a single tall plant with one or two low companions. Make sure all plants share similar watering needs.
Do I need to rotate crops if I use companion planting?
Yes. Companion planting does not prevent soilborne diseases or nutrient depletion. Rotate crop families to a new bed or zone each season.
How do I know if a companion pairing is working?
Watch for healthier foliage, fewer pest reports and steadier yields compared with a previous season. Keep notes so you can compare, since results vary with climate and soil.
Which flowers work best in a vegetable layout?
Marigolds, nasturtiums, calendula and borage are common choices. They attract pollinators and some beneficial insects. Plant them at bed edges or between crops without blocking light.
Conclusion
A strong garden layout companion planting plan starts with sun mapping, groups crops by height and water needs, and applies realistic spacing. Sketch it on paper, rotate families each season and refine the layout after each harvest. With those habits, the pairings you already know will perform far better.
Ready to choose one?
About Graham Fisher
Graham Fisher is part of our editorial team and reviews and edits our vegetable & edible gardening guides, checking product details against manufacturer specifications and owner feedback.